


|
 |
|


|
          |
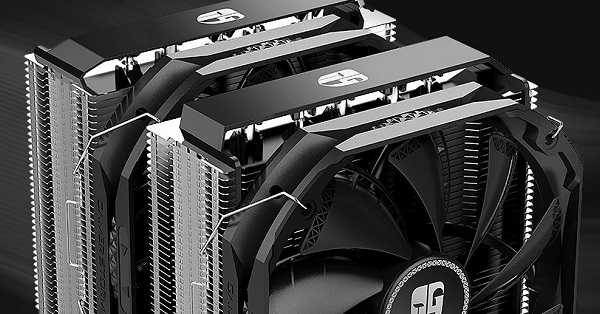
be quiet! Shadow Rock TF2 CoolerSo be quiet! is back on the blog. This time we are going to look at one of their new coolers, namely their Shadow Rock TF2. As the name suggests, this is a new cooler in their Shadow Rock series, and this cooler features the space-saving Top Flow design.
Let's look at the technical specifications. be quiet! As always, has a very comprehensive list of technical specifications. If you would like to read it, you can follow the link at the end of the article or read their data sheet over the cooler here. Here I give a small list of the features that the cooler offers, and as be quiet! Highlights by it. As you can read, the cooler has 5 heatpipes and an 135mm be quiet! fan. Top flow design allows cooling of both the CPU and the surrounding components on the motherboard. Feature Details
Extremely low noise level
Highly compatible, highly functional design
Product design, design and quality control in Germany
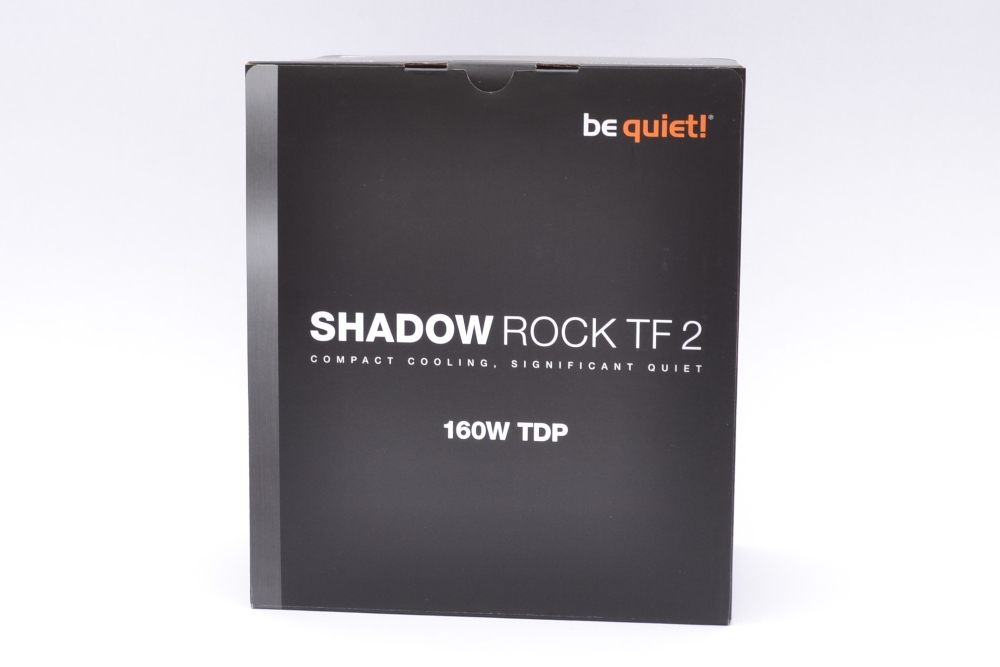
Now we proceed to packaging and accessories. be quiet! Shadow Rock TF2 is packed in a beautiful box with illustrations and specifications on the outside.
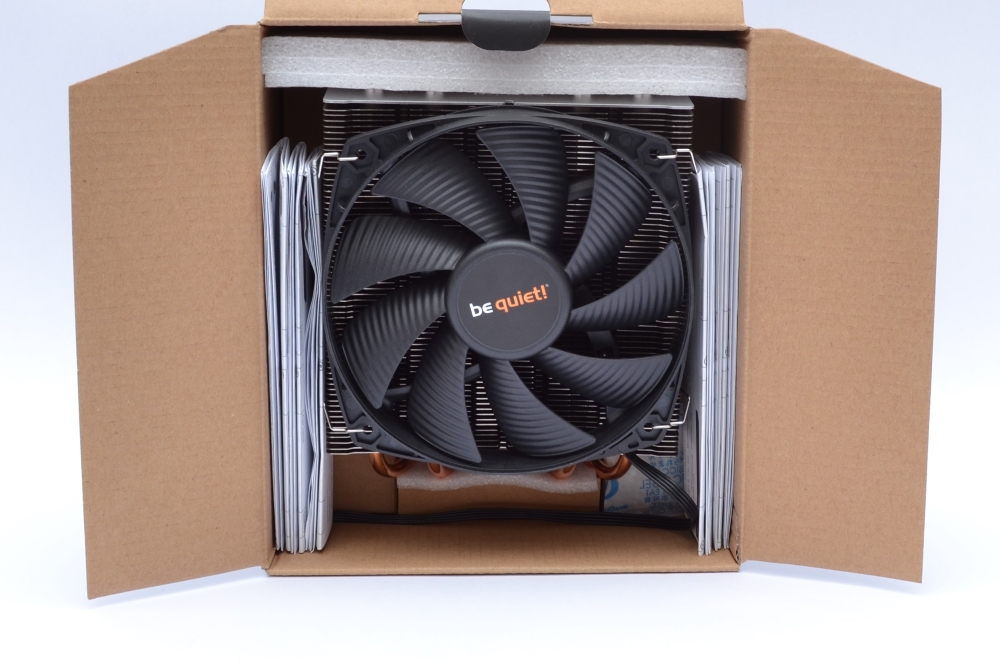
When you open the box, you are welcomed by the 135 mm fan located on the cooler. It appears that the cooler is firmly placed in the box so that it does not get damaged during transport.
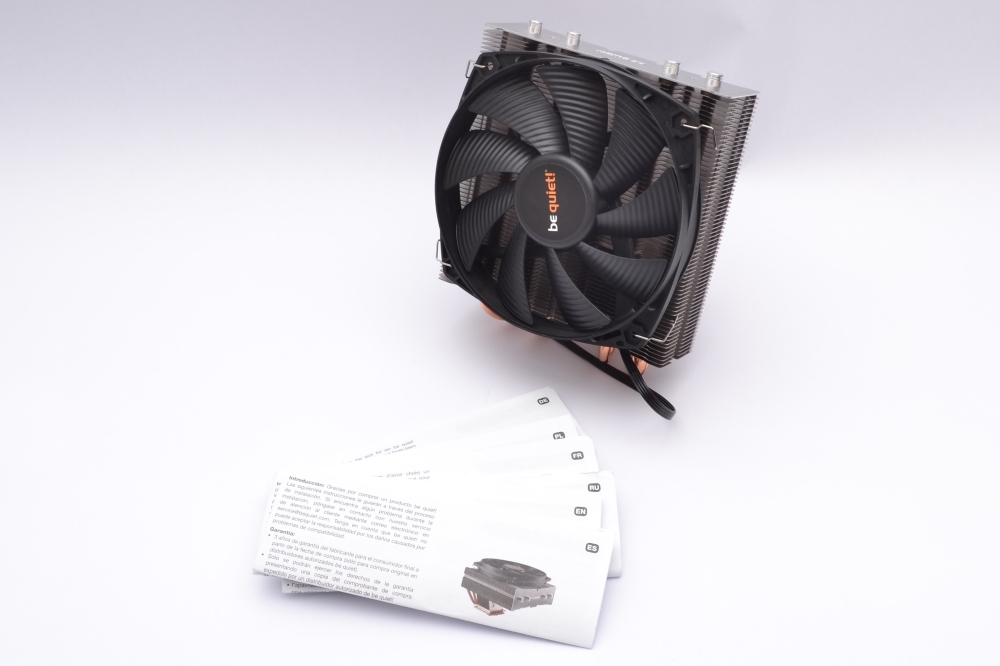
In the box, you will find the cooler and some different user guides. They are all in different languages.
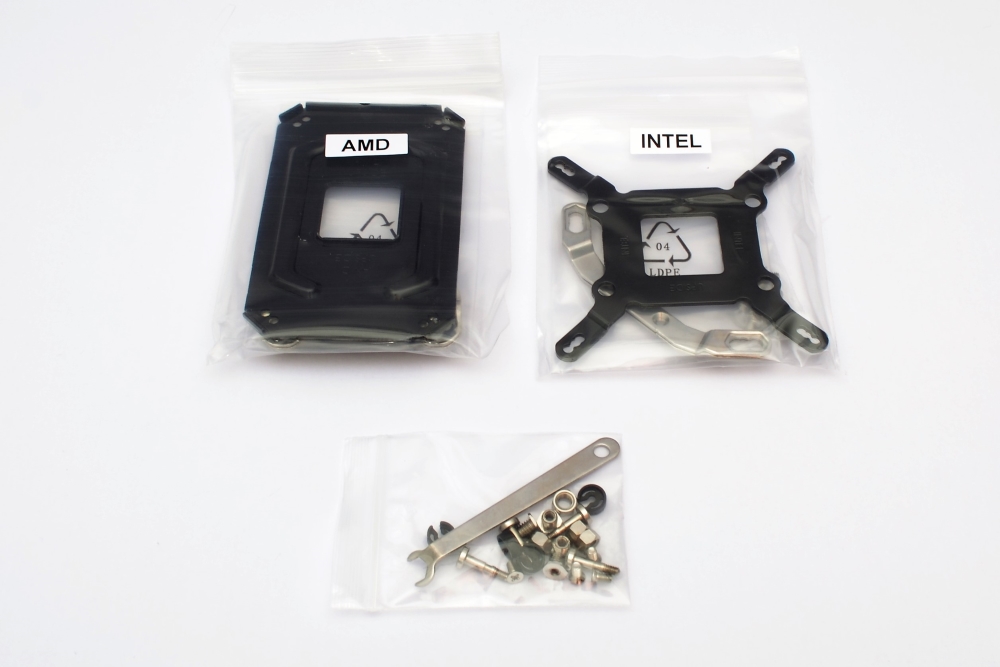
Besides that, we find of course mounting brackets for both Intel and AMD sockets. A small tool is included, so you only need a screwdriver yourself.
Content:
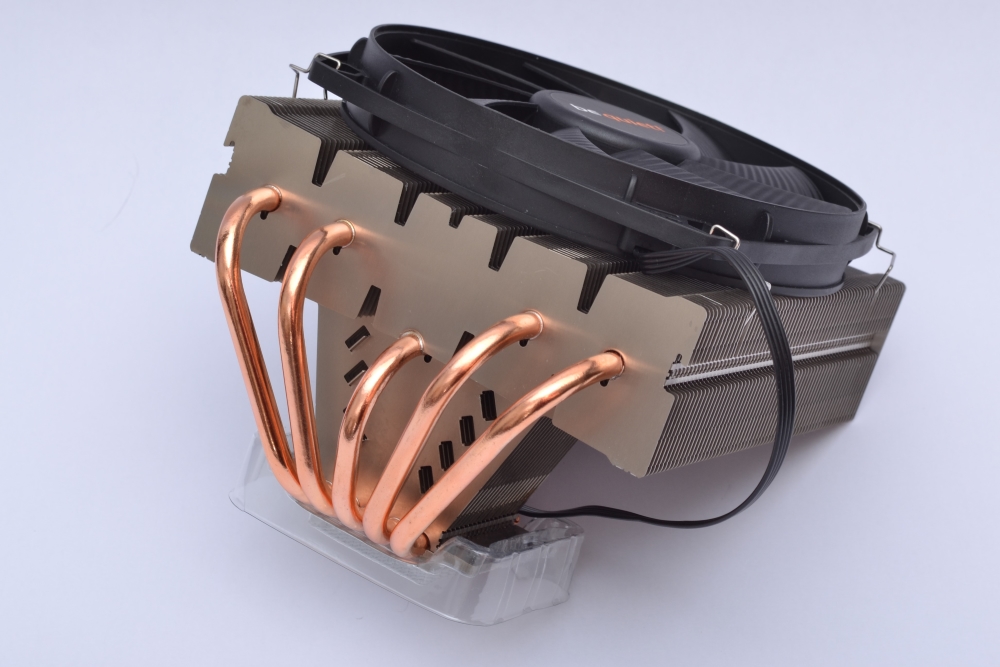
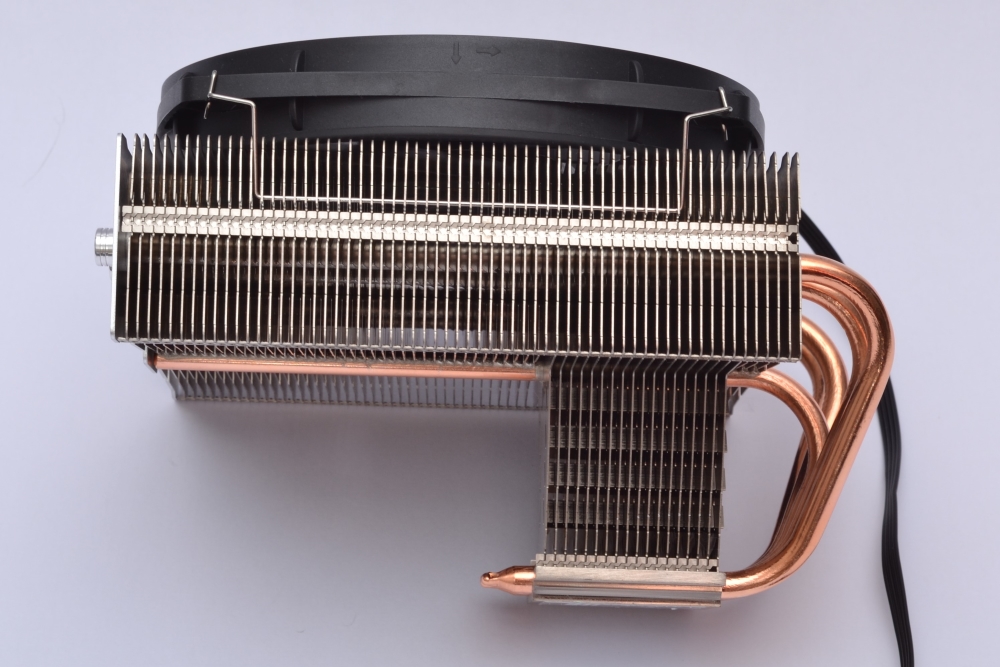
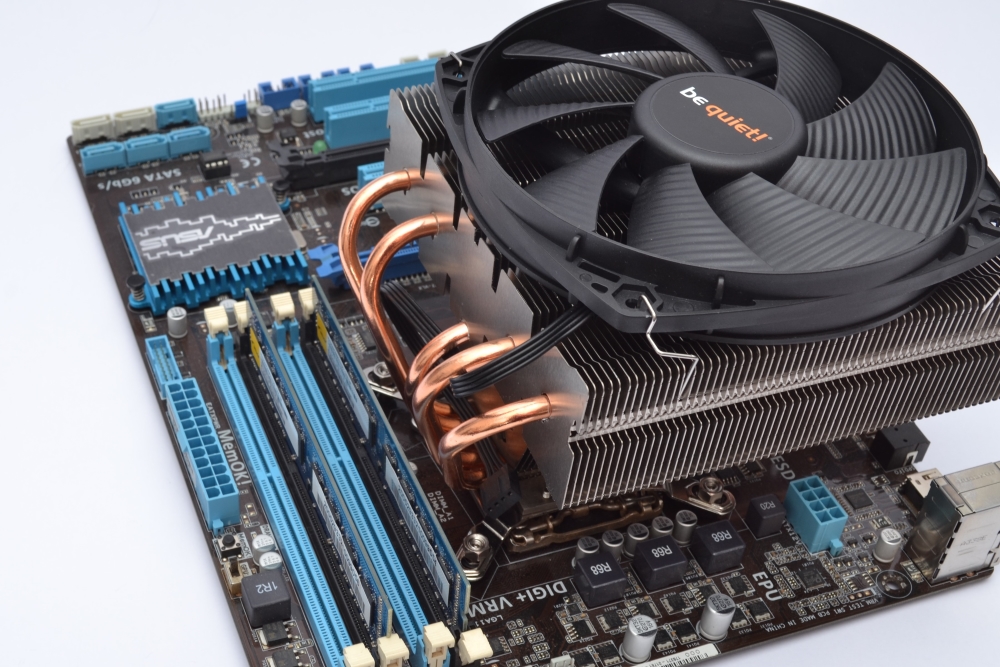
Let's take a look at the cooler. The fan is a 135mm be quiet! fan. It is pre-mounted on the radiator from the factory and is firmly fixed. The fan is running at a maximum speed of 1400 RPM, and is PWM controlled.
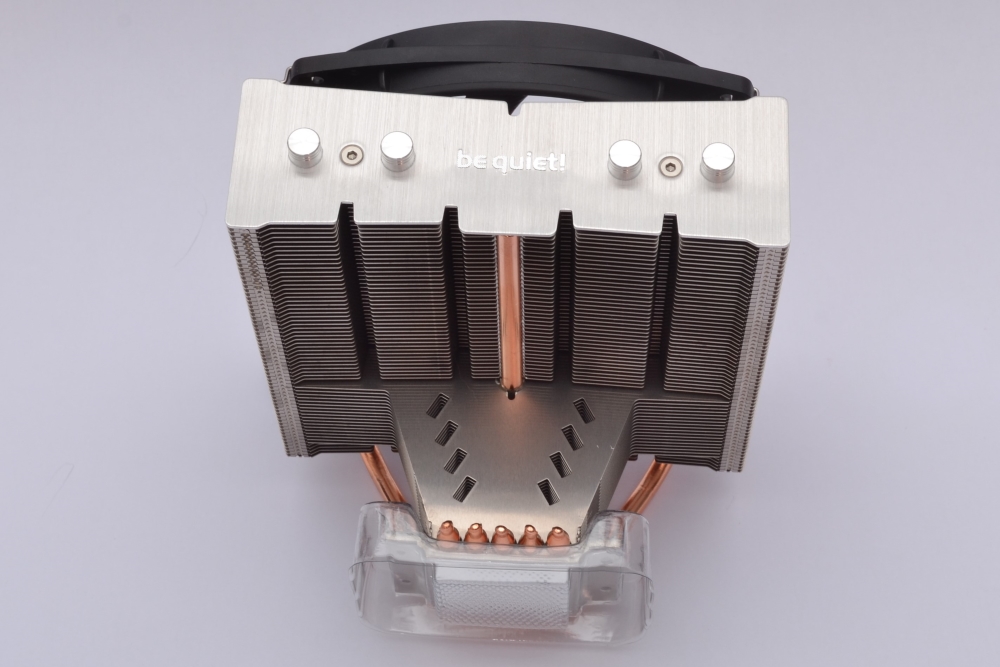
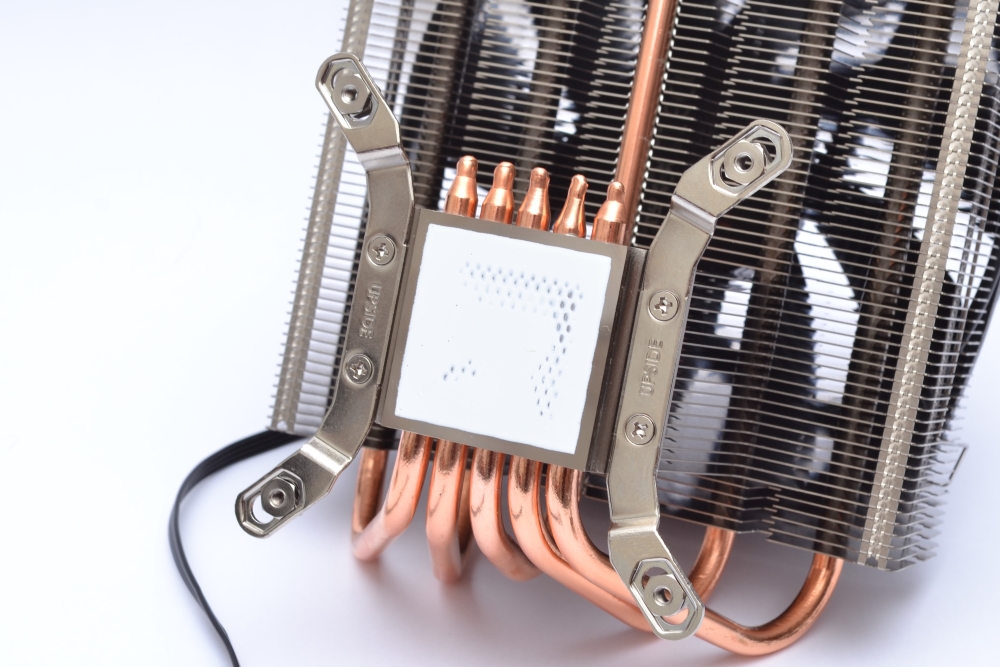
The visible ends of the pipes are covered with nice end caps, and the end of the cooler has a cut-out logo at the end of the plate. It looks pretty nice.
The pipes are bent well and are in copper color. I personally think the copper color is dull and would have liked be quiet! had nickel plated the tubes. But the crafting and the fitting is nicely done.
The cooling fins goes all the way down and support the entire cooler against the cooling head. It provides an incredibly stable construction. If you have tried other coolers with this top flow design, you know that the coolers that are not supported down against the cooling head can be a little 'jingly'.
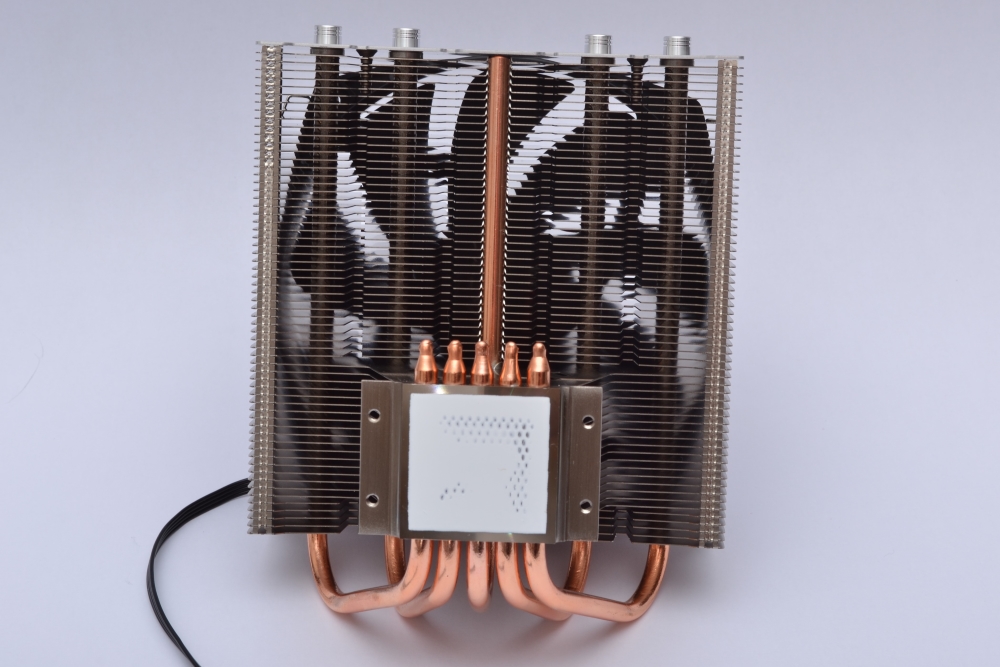
Finally, a picture of the underside. As you can see, some brackets need to be screwed on the head for everything to work. You can also see that the cooling head has got cooling paste installed from the factory. There are advantages and disadvantages about that. The advantage is that there is the layer supplied which the manufacturer thinks it should be and it is evenly distributed. The disadvantage is (as can be seen in the picture) that it may be damaged during transport. In addition, you only have one chance of mounting, so you need to do it right the first time. Personally I like to get a little tube with coolers.
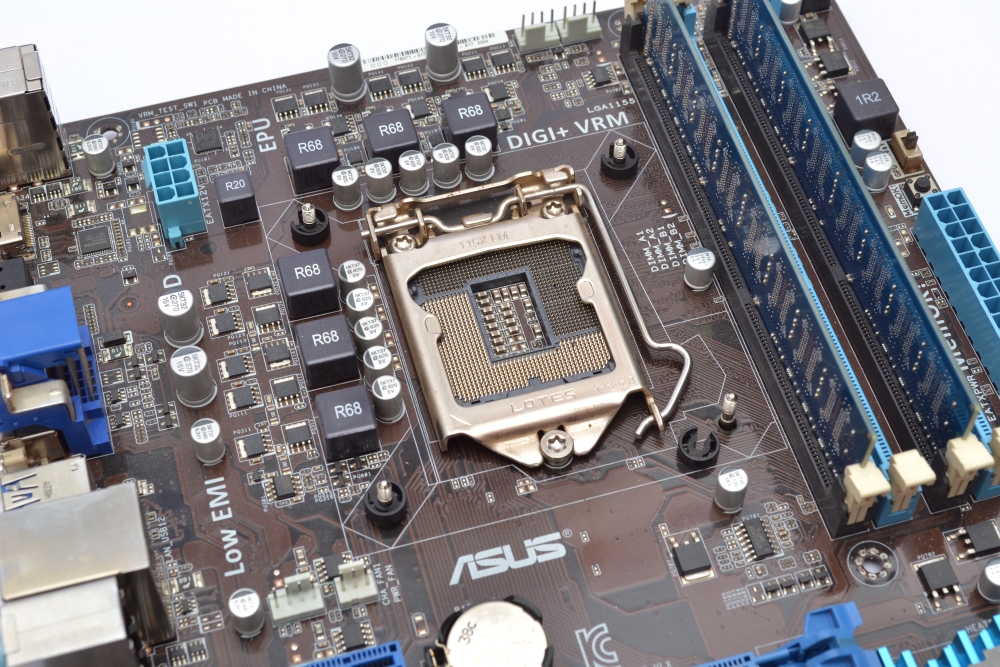
Let's get started with the assembly. Now we have come to the assembly, which is well described in the user guide. The fittings must be prepared without installing them on the cooler. A threaded bush must be assembled with a nut on the bracket, after which it is screwed on the cooling head.
Then prepare the motherboard, mounting screws through the bracket on the back, then insert it through the holes in the motherboard and mount small plastic clips on the front. It's a bit cumbersome with the clips, luckily, I have good space on my motherboard, but the motherboards that are well packed might be difficult to mount on.
Finally, the cooler is installed on the motherboard. It's actually a bit difficult because you can not see where the screws are in relation to the threaded bushes. It gave some challenges, but eventually I succeeded. I do not want to judge this cooler as the easiest one to mount. There is plenty of room for high RAM and VRM profiles. You can turn the cooler as needed, and it can actually go over the RAM sockets. You should be aware of which profiles you have, as some profiles may not fit below the cooler. But there is room for some cooling profiles.
The PCIe ports are also no problem. There is ample space for my graphics card here, and I would also be able to mount something in the first slot, even if it does not look like that. That's probably the angle the image is taken.
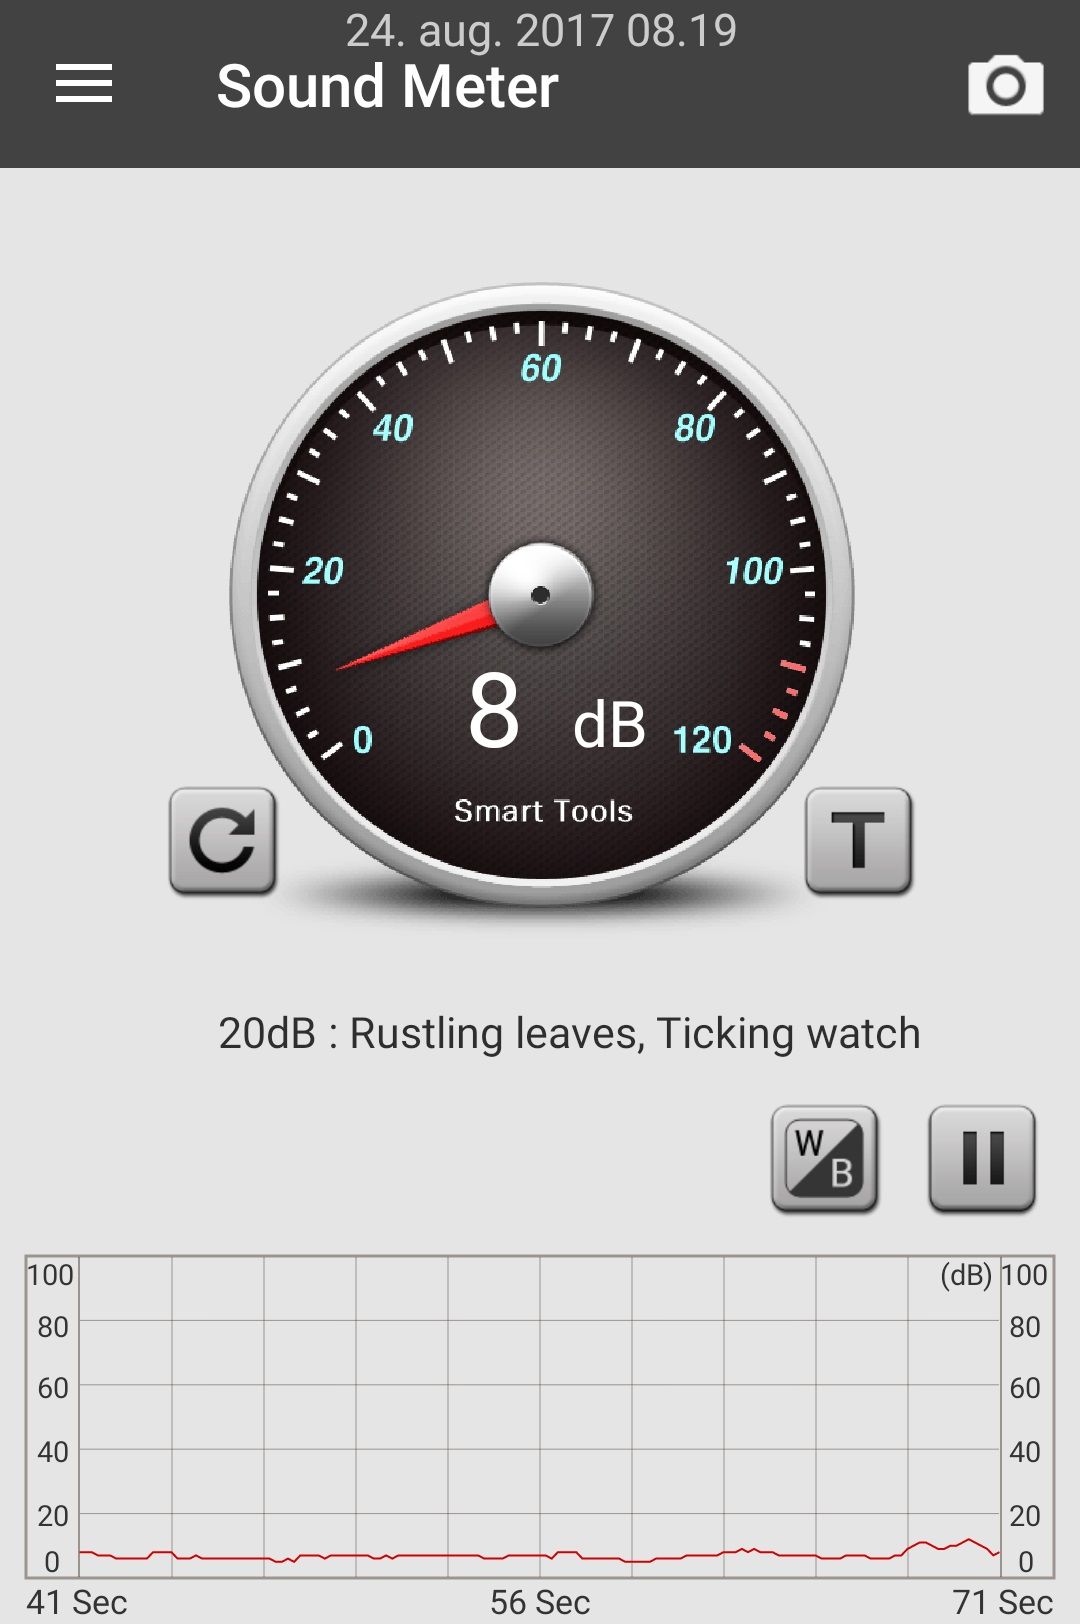
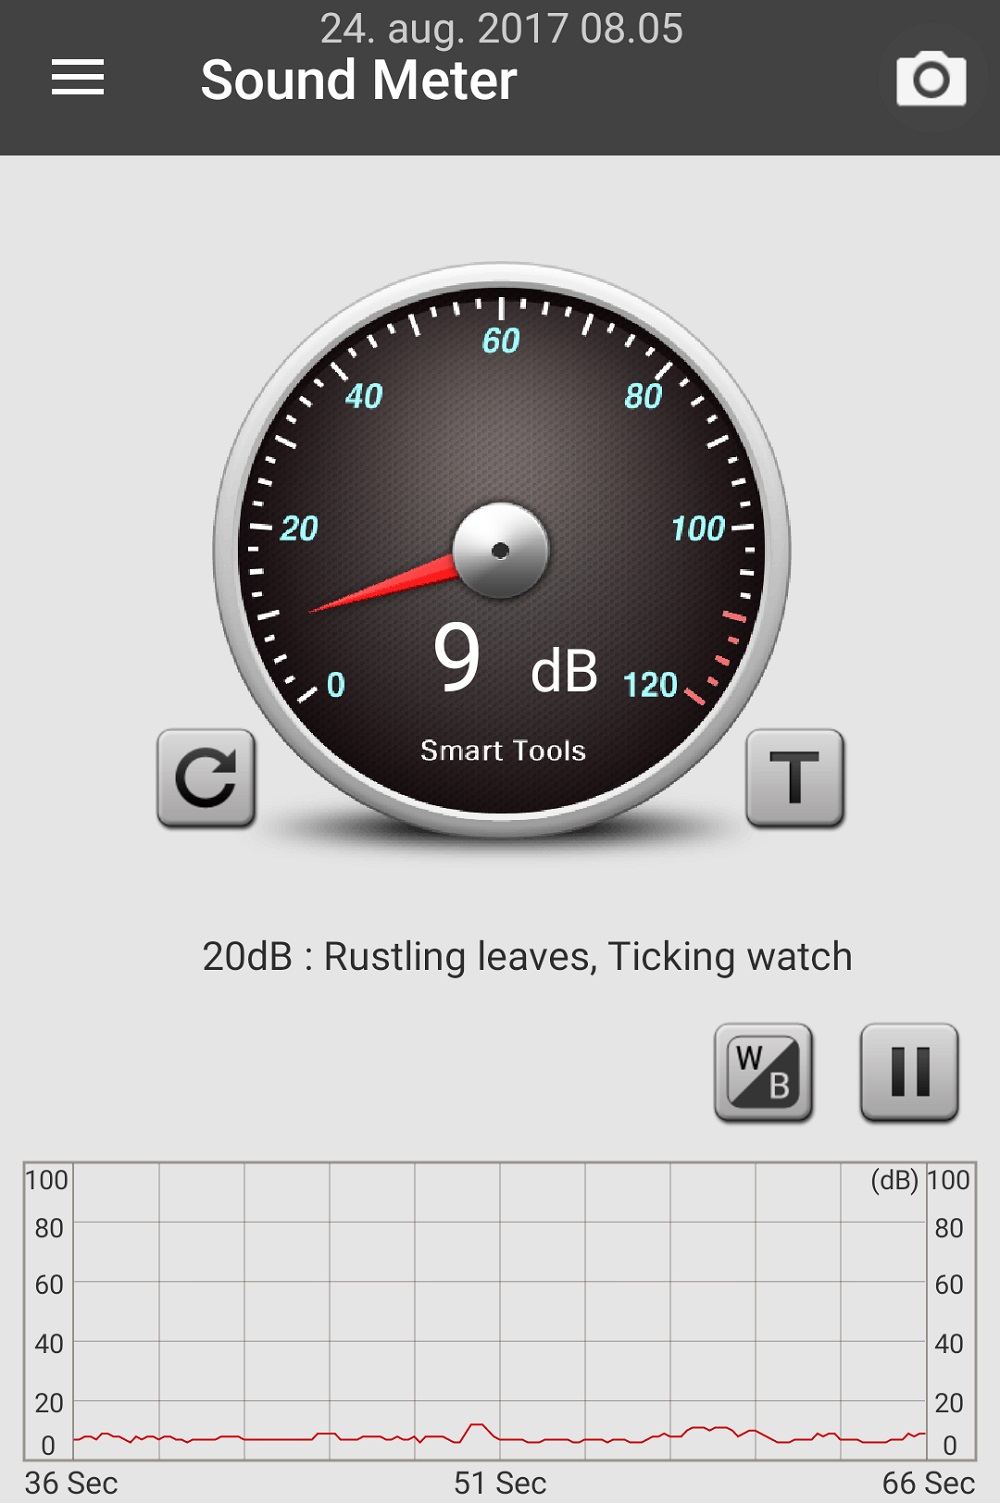
Moving on to the test. Sound test: Before the stress test, we do a small audio test. In the video below you can hear how the fan alone and mounted on the cooler sounds. It make an impressive small amount of noise considered the airflow and RPMs. Not even mounted on the radiator, the noise is anything but annoying. Once installed in a casing, this cooler will not be heard. However, there is a audible difference between the noise itself if the fan is mounted or not. I actually think the noise where it is NOT mounted is more annoying than when it is mounted. Which is a good thing.
As you also see at the dB measurement, the noise is extremely low. I have reset the meassuring, and adjusted it down to 0. The measurement is done with mobile phone, so it's not the most scientific measurement. But it gives an idea to my other tests of how much it noise it makes.
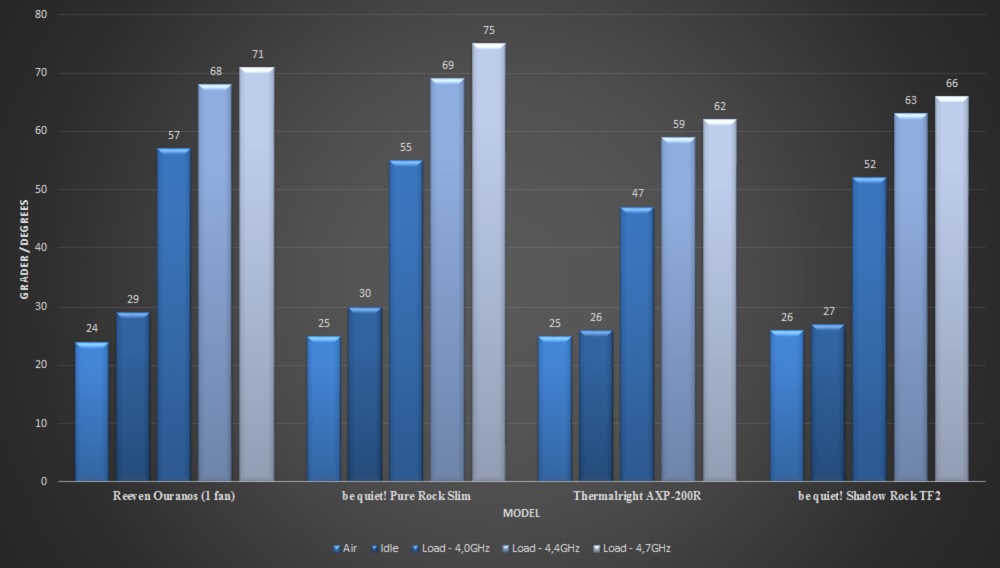
Stress Testing: All of my coolers are being tested with fans on 100% speed. I have chosen to show my readers how much the coolers can perform at max. I'm aware that it makes more noise, but hopefully you do not have the need to drive with the fan at 100% under normal conditions. Setup: I use the following setup for my tests, and can clocke my processor up to 4.7GHz. All overclocks are done with the auto function on the motherboard, as it actually works quite well.
Software: Of software, I chose to use Prime95 without AVX, as it loads the CPU in a more natural way. The new versions of Prime95 can also be used, but remember to turn off AVX to get a more natural load of the CPU. For measuring temperatures, I chose to use HWinfo64 , which is an excellent tool for that. Temperatures are measured after a heating time of typically 10 minutes by air coolers and 30 minutes by water coolers. The cooler would then be stabilized and the measurement should be done over a 2 minute period after heating. Measurements: Fan RPM: 1400 I actually think the cooler performs well. You can compare this cooler with the Thermalright AXP-200R regarding the design. The Thermalright Cooler is also a Top Flow Cooler.
If you want to see a list and results with all the air coolers I have tested, you can find the list at the link below: http://www.monberg.dk/pics/General/fantest_air.jpg
What is the conclusion of this test then? be quiet! Have done it again. They have made a nice looking cooler, which is also pretty good. It has one of their own fans (I did not expect anything else), which is incredibly stable and quiet. There are end caps on the pipes, giving the cooler a nice finish. Everything in appearance is a personal taste. For example, I do not like that the tubes are copper colored instead of blank nickel. I think it gives a messy look with 3 different colors on a cooler. But again, that's a personal opinion, and not one I can blame be quiet!. There is no tube of cooling paste that allows you to re-install the cooler with the cooling paste be quiet! recommends. I think that's a shame, especially when I receive one where the factory-installed cooling paste is broken. The installation of this cooler is certainly not the easiest one I've tried. You have to control things from both sides of the casing/motherboard while taking care not to damage the coolingpaste paste. It makes it all a bit difficult I think. The price of the cooler is just over 400 DKK at the time of writing, which is quite a nice price on this cooler. But despite the price and performance, I choose to give this cooler a Bronze star. I do so because there are some shortcomings that, in my opinion, count high on the scale. A cooler SHOULD be easy to install, and there should be refrigeration paste enough for at least a couple of mountings. Read more about be quiet! Shadow Rock TF2 here.
|
          |
|||||||